 timetravelcostumes
Dress Diary: Black Neo-Victorian 80s Mashup
I have made this dress diary as detailed as possible in hopes that it will be helpful for someone else attempting this (fairly difficult) pattern. I've done my best to note each step using the numbers in the directions so it will be useful to someone with questions of his or her own, although I made several major changes to the original pattern. There are 72 steps in this pattern.

This costume was commissioned by a client who lives in Washington State. She requested a gown similar to my previous Neo-Victorian gown, without the excessive amounts of lace and trim that are typical for Victorian gowns. Removing the trim should save a great deal of time although it will require some creativity on my part when it comes to hemming and other finishing tasks. I will be updating this page as the work progresses, with an expected completion date of August 20th or so.
June 17 - July 5 - July 12 - July 26 - July 29 - July 30 - July 31 - August 1
June 17, 2009.
Having received the initial deposit and the go-ahead from the client, it's shopping time! With some careful coupon clipping and lots of calling around to the different Joann's near my house, I kept the costs down on this gown. (This costume could easily have run into the $200's for materials alone, especially if the client had wanted the lace and trim which often shows up on Victorian gowns). The total materials cost so far is $72.
Pattern $9
Fabric $56 (I used a 50% off coupon on this - a huge cost savings!)
Buttons $5
Thread $2
I will be lining the gown with the same fabric as I am using for the body.
July 5, 2009. 7.5 hours, cutting, steps 1 - 4.
My sewing room. Always a little cluttered. Soon, the shelving on the wall will be removed for use at the bookstore. (Thank heavens.) So nice to have a room dedicated to sewing, that can be shut off from the pets!
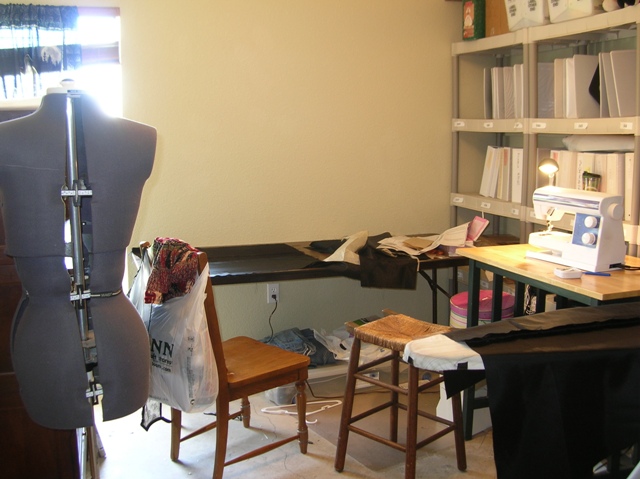
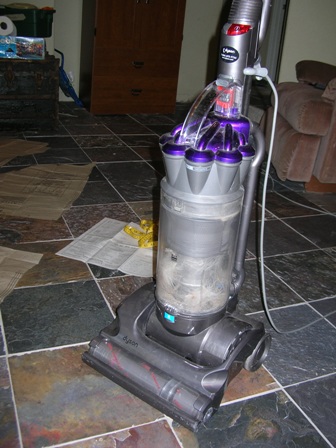
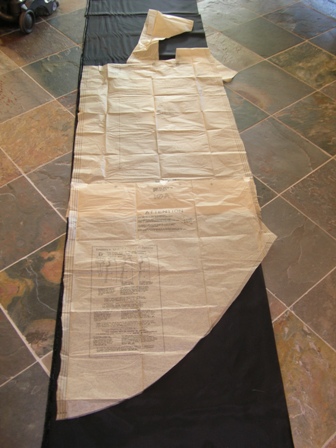
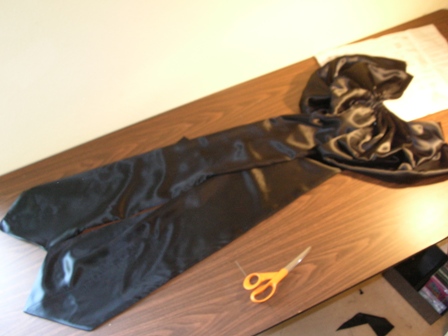
Cutting: As some of the pieces in this pattern are longer than my sewing table, I had to use the living room floor to lay out the fabric. Important tool for this step: the new vaccuum! ;-)
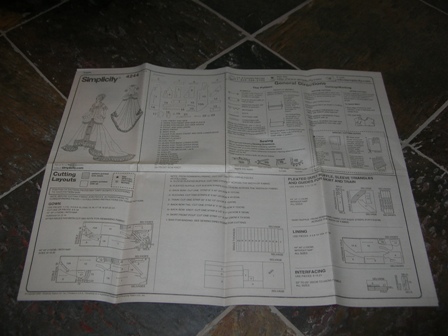
Pattern has a couple of unusual items. First, several pieces must be cut which are NOT given. Had to read directions carefully to discover a list of pieces I had to measure and cut without assistance of tissue pattern. Not difficult, but must pay attention to directions. Also, some pieces are not fully assembled! Must pay close attention and tape "10" and "10a" together before cutting:
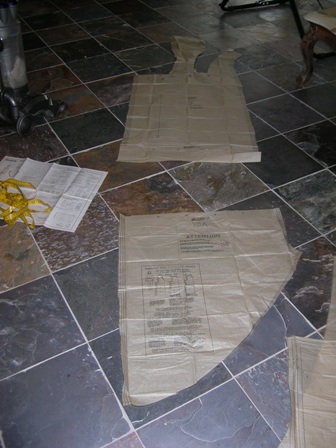
Ran into unexpected problem. Largest pattern piece too wide for fabric when folded normally. Simple (if labor intensive) solution is to cut two long bits, unfold them (with much ironing) and lay them on top of one another, providing a double layer of fabric for the piece. (Actually, as am required to cut 4 including the lining, had to do this twice.)
Once all pieces cut out (including lining), time to start sewing.
Step 1: side front and front skirt pieces to one another.I went to a lot of trouble to use the selvage as the side of the piece whenever possible. Though this is normally not the correct method, I prefer to use the selvage when I am working with silk since it lessens the fabric's tendency to fray. Must be careful to allow a tiny bit of extra (about 1/8 inch) and then pay close attention when sewing the seam so the selvage never shows:
Step 2: Skip. (Am intending entirely different hem from pattern instructions, so this will be unnecessary.)
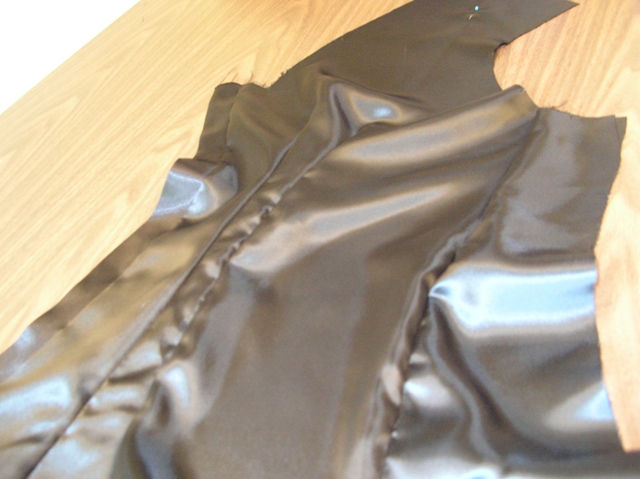
Step 3: join lining and skirt front pieces. This gave me a lot of trouble the last time, but was easy today. The trick is to pin from the middle out, so the seams of the two skirt pieces are flat to one another. The edges will be uneven, but trimming the edges is preferable to having the seams off-kilter. Like this:
I have been surprised to discover this is similar to laying tile, in that the important thing is to remember which "line" matters most. In this case, the seam is the line that matters, not the edges matching up. So pin from the middle seam out!
Step 4: join skirt and bodice lining pieces. Had to do the usual easing to get the pieces to line up (why is silk such a pain with this kind of thing?!). I decided to flat-fell the seams, which is not required by the pattern but makes the difference between professional and amateur in my opinion. I learned flat-felling last year when making the civil war chemise and it is really quite easy!
An ordinary seam, interior view (meaning this would be visible to the person who wears the garment only):
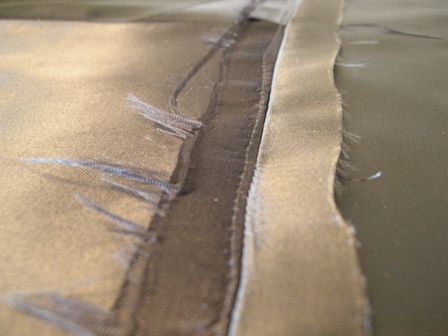
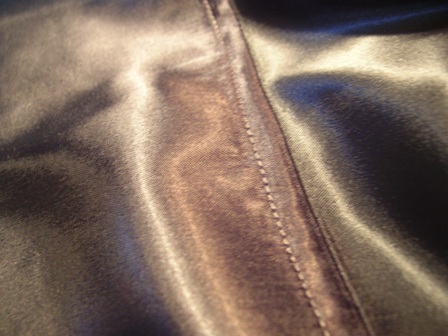
A flat-felled seam, outside view:
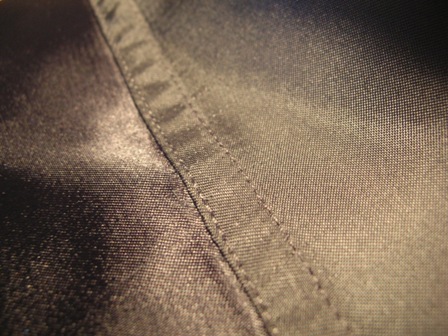
A flat-felled seam, inside view:
So the downside is that there IS a line of stitching on the outside of the garment. But I think it is worth it since there are no raw edges on the inside. Especially important when working with silk like this that frays so easily! I will continue to flat fell the seams, I think, for the rest of the garment. Especially since most of these seams are covered anyway.
.
July 12, 2009. 9 hours, steps 5 - 19
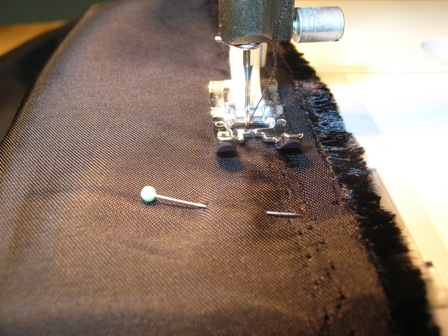
Most of today's work involved the front of the gown, and the side panel (which will later wrap around back to become the mini-bustle piece). I did the steps in a slightly different order than the instructions suggest, in order to make my life easier. Also, since I don't have a Serger (yet!) I am doing full seams on all the edges so that the silk doesn't unravel. The patttern suggests a simple zig-zag finish, but I am concerned the fabric is too delicate to stay in place if I do that. So I have done full hems on each piece in order to ensure the gown doesn't literally come unravelled!
Step 5: Assemble front and side to front and side lining. I finished the edges of the side front pieces with real seams - not zig-zag as reccommended by the pattern. This adds to the time but is entirely worth it, especially since I will NOT be using lace on the edges here to cover the raw fabric edge.
Steps 6, 7, 8 & 9: Attach the front placket (for later button placement) and the front facing, being sure to take the time to line these up correctly. If they are not lined up correctly the entire gown is ruined; the line runs directly down the front of the wearer's body and MUST be visually appealling.
Step 15 & 16: Complete the darts. (Yes, I did this step out of order - it was easier than trying to make darts later when there is a larger amount of fabric to handle. Just be careful to get the two sets of darts "mirroring" one another!) This is probably the most difficult step in this pattern, especially when using slippery fabric like silk or satin. I hand-basted the darts (using a contrasting thread color) so the extra layers of fabric don't slide around under the sewing machine when I do the darts for real.

Note that my stitches are exceptionally large. This is to allow for fabric manipulation if it turns out that I have made any small errors later. (I didn't need them - I did everything fine this time around! But, better safe than sorry.)
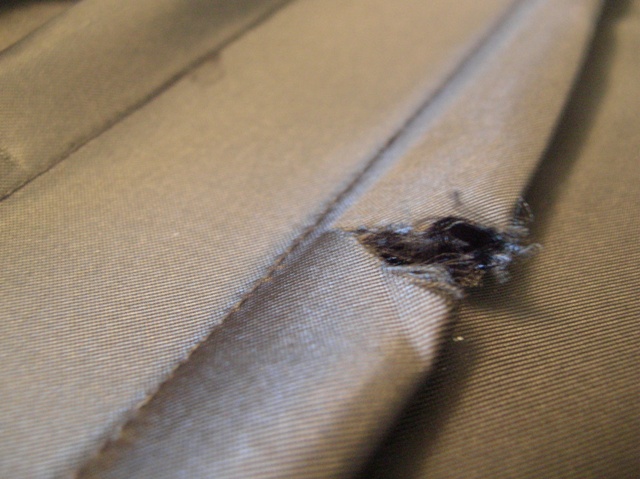
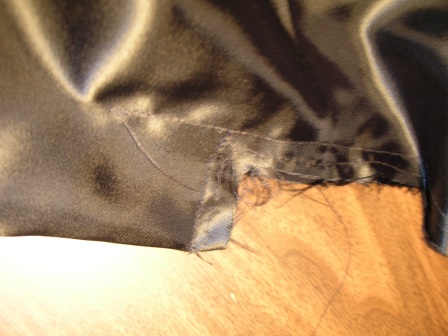
The only real obstacle in my crusade against raw edges is the clip that must be made in the back of the dart. There is no way around it. It must be done or the bodice will look very odd. But as you can see here, the fabric instantly starts to fray. I think I may cheat and paint the edges of this clip with clear nail polish!
Darts without tucks, glitches or mistakes. Has hell frozen over?
Steps 10 & 11: Put the two sides of the front together. This can be tricky with the placket and facing; take extra care to line things up correctly. I flat-felled the front center seam so it would not have an inside raw edge.
Step 12: Make the front pleats. Take the time to make sure the two sides line up so that the pleats are a mirror image of one another. These can make or break the "line" of the front of the gown.
Step 13: I skipped it as my client requested that I remove any lace from this pattern.
Step 14: Make a tiny seam that will join the pleats you made in Step 12. (It's marginally more difficult if you are working with lace - just make sure you don't get the lace tangled up in the seam.)
Steps 17 & 18: Use the guides to make pleats. Pleats are fun and look really fabulous when used wisely, plus they allow a lot of wiggle room if you need to adjust anything. However, you need to be careful to read the directions about five times before you make the pleats. Trust me on this one: you do NOT want to make the pleats backwards, inside-out, upside-down, or any other way that's not in the directions. Pleats are not a good thing to do late at night, or when you are distracted by a small boy who wants you to read "Thomas the Tank Engine: Catch Me! Catch Me!" for the five thousandth time.
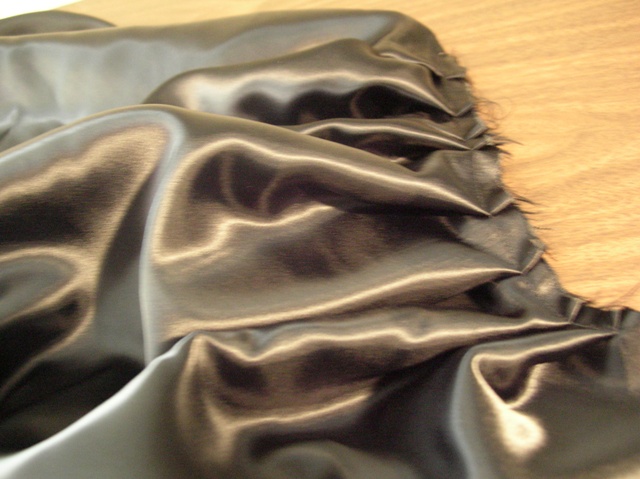
These are the pleats that will sit low on the wearer's hip, gracefully pulling the fabric up to the back for the mini-bustle. This set of pleats reminds me of a Nautilus, especially once it is installed in its correct position.
Step 19: these pleats are easy, but unusual, so pay close attention to the pattern where it says "fold" as opposed to "pleat." They really mean it.
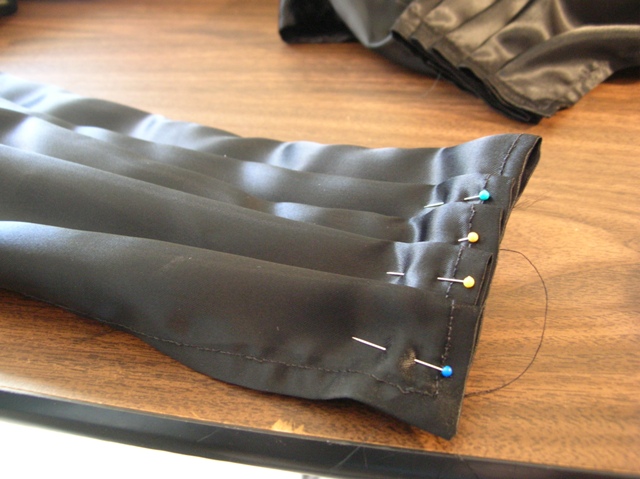
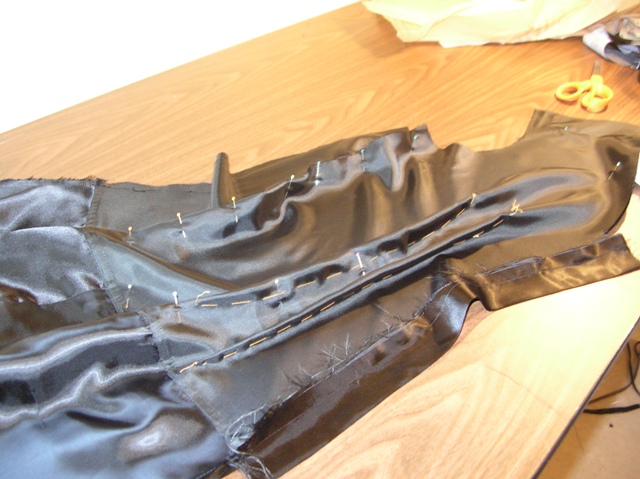
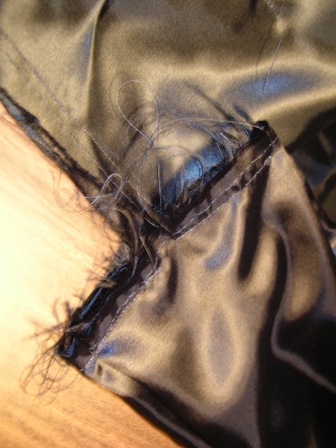
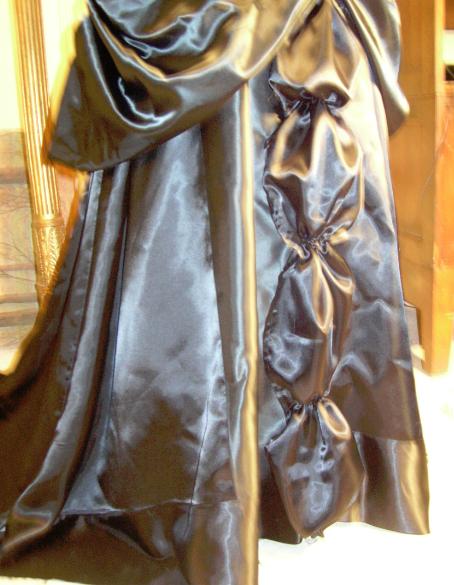
This set of pleats (you can see the right side, completed, in the background, and the left side, pinned, in the foreground) will attach just above the wearer's behind, and be decorated with a very large satin bow. I found it necessary to lengthen my stitch size when I sewed these together, as there were too many layers of fabric for the smaller stitch size to handle effectively.
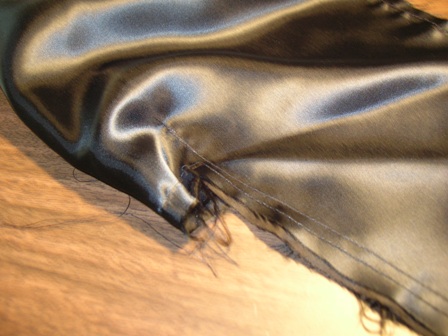
You can see here another example of a seam that the pattern said to leave essentially unfinished, but I chose to turn into a neat hem. It won't be visible (under the bow!) but I think it makes all the difference in the world.
July 14, 2009. 2 hours, steps 20 - 22
I rearranged the order of the assembly a little here. As a result of my Crusade Against Raw Edges, I decided to assemble the lining and the dress sections independently of one another and then assemble them after the seams are done, leaving neat flat seams inside and out (and eliminating the need to flat-fell here). The following three steps are MY version of them, NOT the pattern's version.
Step 22: Stitch train to back. Stitch train lining to back lining. Press seams out flat.
Step 20: Baste train and back to train and back lining, having upper edges even and excess at lower edge (later to be hemmed). I just basted the tops, leaving the hems free so I can do what I want with them when I hem them by hand later.
Step 22: Stitch train and back to train and back lining (that's the part that was basted in Step 20).
July 26, 2006. 11 hours, steps 21 -44
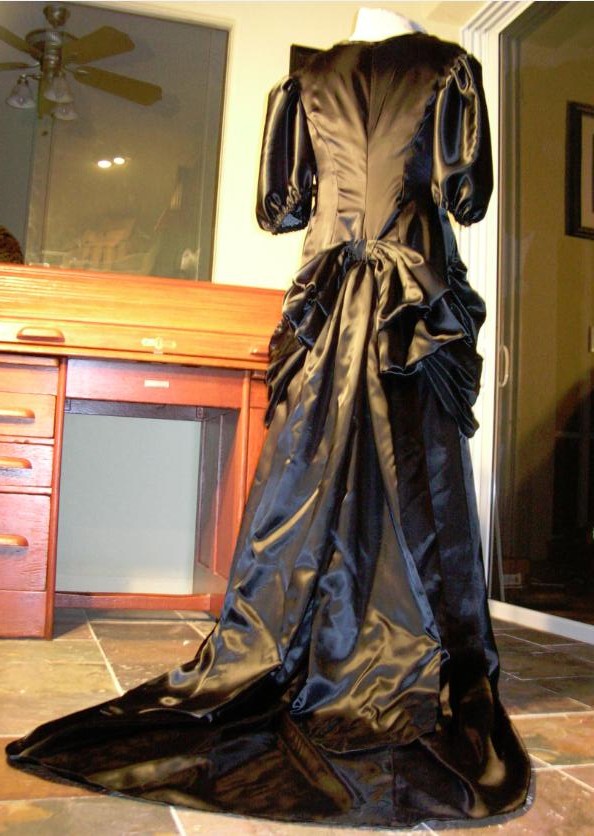
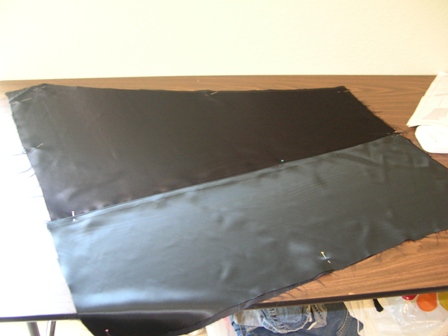
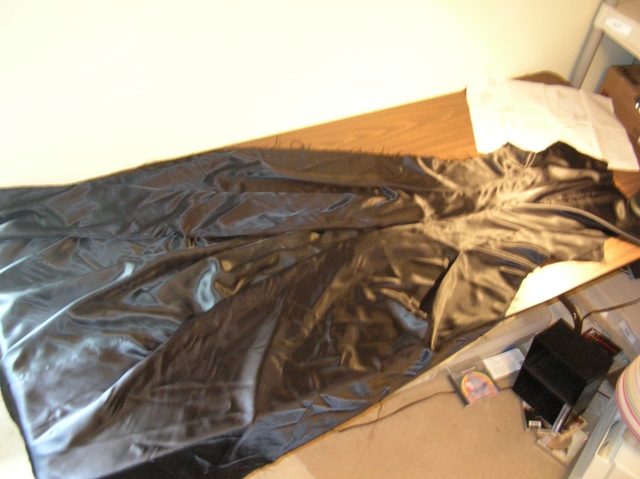
Here is what the back looks like now that all six pieces have been sewn together. It won't all fit on my table so I folded up the train bits and laid the top side flat:
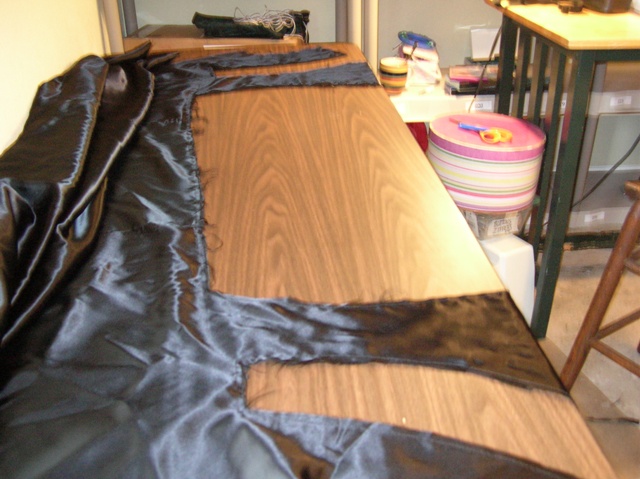
My table is six feet long, but all this fabric will be pleated up until this piece is the width of the wearer's waist! This is where that huge amount of bulk comes from, which will create the illusion of a bustle.
Step 21: Make the pleat as instructed. (More raw edges. Bummer!) I ran into an interesting problem here, probably having to do with the four layers of slippery satin. The resolution was to simply allow the excess fabric to squish itself into the pleat opening. See what I mean about pleats? They are God's gift to the seamstress!
Correct:
Incorrect, but acceptable:
Step 23: make pleat that forms the bustle illusion. It looks pretty messy from the inside but that can't be helped:
It looks great from the outside, and that's what matters (excuse the wrinkles):
Isn't it amazing how this huge piece of satin got compressed down into that back piece?!
Step 24: Sew the back to the front. More difficult than it sounds since you have to be careful not to catch the side pleats (the ones that make the bustle) in the side seam.
Steps 25 - 34: Skip, as I am not trimming the gown according to the original instructions.
Step 35 - 37: I used the collar facing to create the simple, "flat" collar that my client requested. Since it has to be sewn down by hand this took a while, but it turned out well.
Now the dress looks like a dress! A wrinkled & unfinished dress, but it will improve with a little ironing. :-)
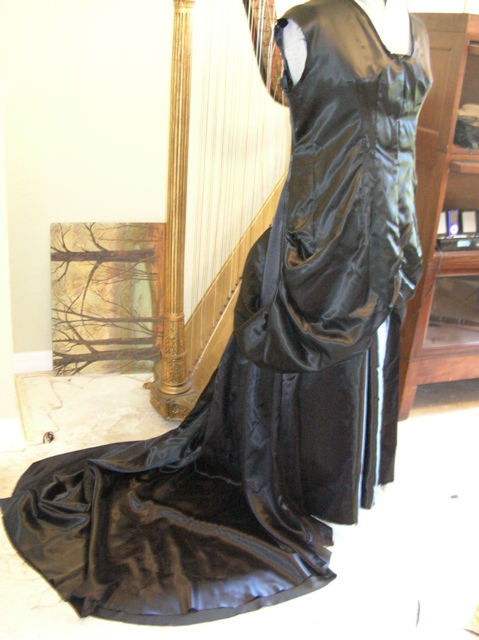
As you can see from this photo I ran into two problems. Problem #1: dress form. Problem #2: length.
This is the point where I would have my client come in for a fitting, if she didn't live on the other side of the country. Since she does, it becomes important to make my dress form EXACTLY the right size. As you can tell from the photo, it is not very precise (that's why the waist looks kind of baggy - that, and the fact that it's not buttoned yet!), so I decided to get creative and I added a sweatshirt, a petticoat, and a corset:
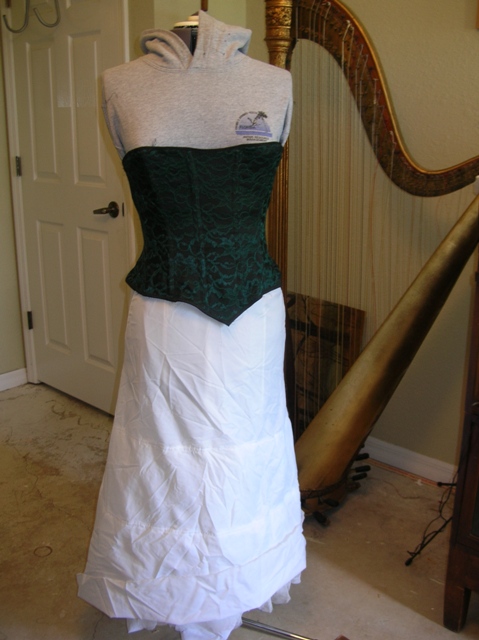
Triple checking the measurements of the dress form against my client's measurements, I think I have a decent dummy to work with. So that takes care of Problem #1.
Problem #2 is a little more serious. The dress is too short. I added several inches to the pattern when I cut out the fabric but I obviously should have added more! The solution turned out to be adding a 6-inch band of fabric around the bottom, thus (I also pinned on the "front pouf" so we can be certain it will look good):
I like the result - I think it defines the hem rather nicely and I am thinking of doing it again in future when I work with this pattern. "Necessity is the mother of invention." More importantly, the dress' future owner likes it too!
Step 54: Make the front pouf. (I did this out of order so I could take the photo you see above.) I added an extra 8" or so to create a fourth section, since I am not trimming the gown the normal way and the pouf would be too short if done according to the pattern.
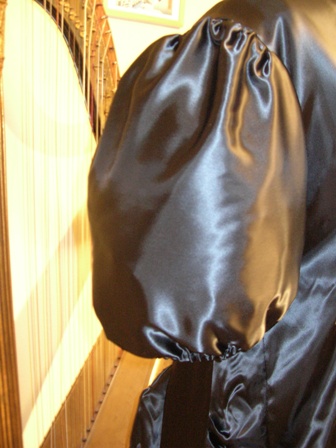
Steps 38 - 43: Skip, and replace with the puffed sleeves requested by the client.
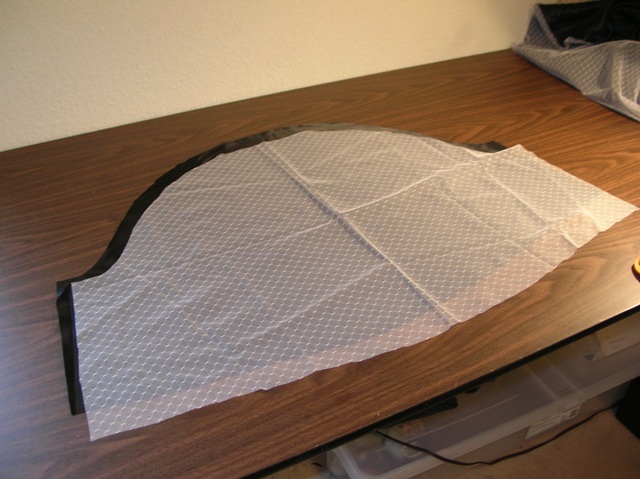
I had to draft the pattern for these myself, but puffed sleeves are pretty simple. I made them as large as possible given the width of the satin available (45"). Digging around in my fabric stash, I found some tulle-type netting that I can use as a lining for the sleeves. This is a trick I only recently learned, and it makes a huge difference to the sleeve holding its shape. Here are the cut out pieces for one sleeve:
I used the measurements of the original sleeve from the pattern (the peice titled "sleeve facing") to determine the correct length for the elastic at the bottom of the sleeve. (Typically, you would try to avoid using elastic in a period gown, but this gown is an exception to a lot of rules - it's "historically inspired" rather than "historical.") I created a simple channel for the elastic rather than using any kind of sleeve band. (A sleeve band changes the look pretty drastically, and I was afraid it would make it look too 1980's if I used a sleeve band.)
Step 44: Attach the sleeve to the gown. Even if you use the original sleeve pattern you have to be very careful here, because of the multiple layers of satin involved. It's very easy to miss the lining and end up with an exterior raw edge - so double check your seams when you are finished. In my case, I did the check when I pulled out my gathering stitches.
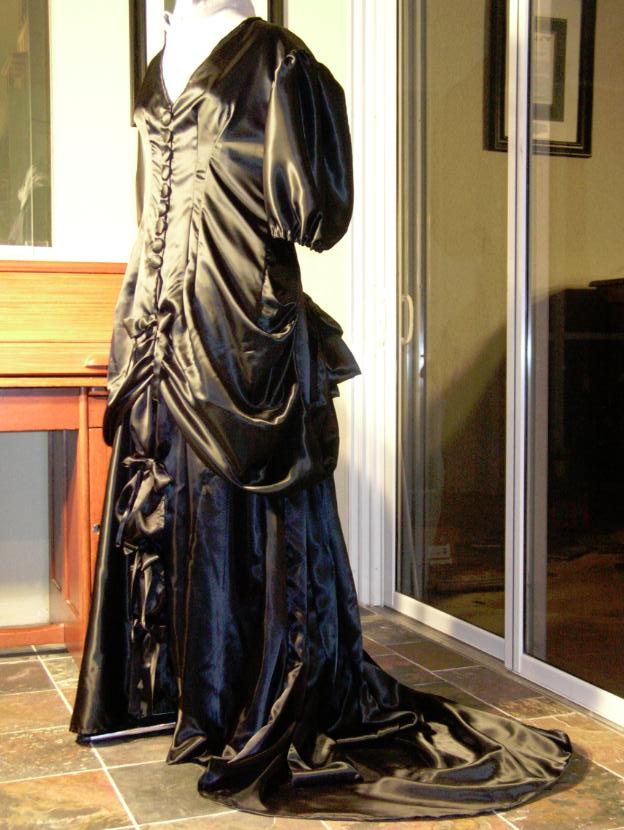
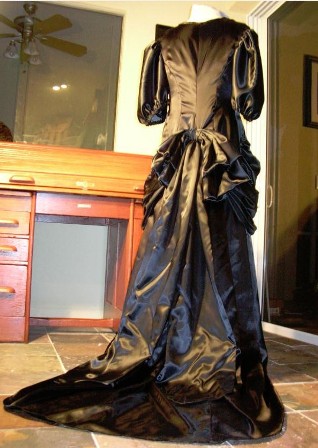
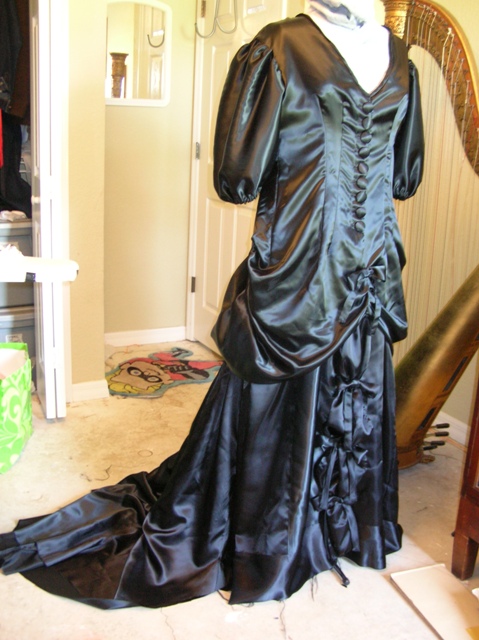
Full-length photos of the gown as it currently stands (wow I really need a new camera):

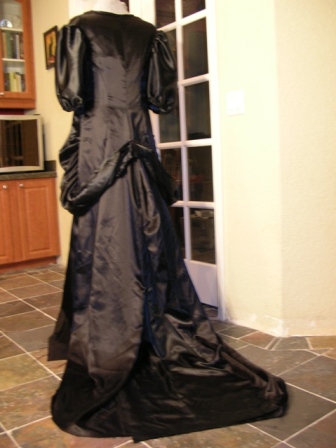
I love the train on this pattern. It's so simple, yet so elegant - not too big, not too small. It doesn't make the gown look like someone just piled fabric on, but it doesn't look informal either!
Step 45: I skipped this step since I'm not trimming according to the instructions.
July 29, 2006. 2 hrs.
The gown's future owner emailed and asked me to change the square neck to a V-neck. Once I figured out how to do it, it wasn't that hard, but I admit I had to sleep on it before I decided what to do. Anyway, it turned out to be pretty straightforward.
Before:
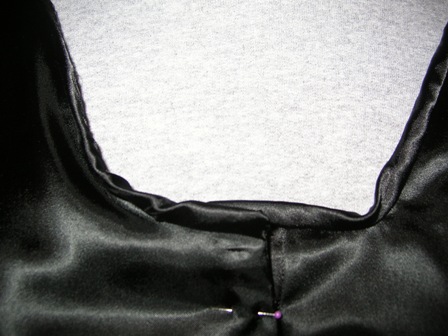
After:
Step 46 - 47: Finish front and side drape.
Steps 28 - 53: Skip as I won't be trimming according to the pattern. Instead, I will hem the gown in a more traditional fashion (see below).
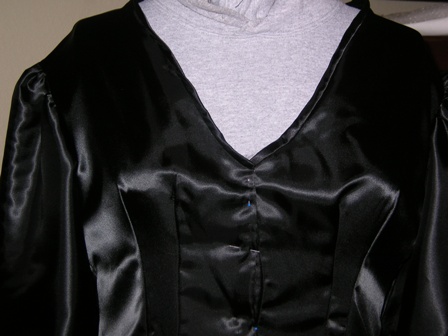
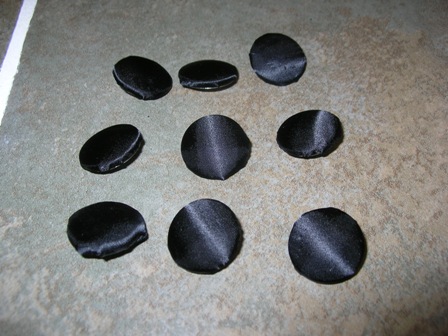
Step 65: Buttons & button-holes. (I'm going out of order again.) The pattern calls for 15 1/4" ball buttons but, at my client's request, I have changed this to nine 1 1/8" self-covering buttons. Covering the buttons is kind of a pain, and I always end up with sore fingers because of the little teeth inside the buttons, but I admit they look awesome and are almost certainly worth the pain.
July 30, 2009. 4 hrs.
The buttonholes require some delicate work because I have to re-do the placement from the original pattern but it's not a problem. I tried a new trick today, to get the buttonholes lined up straight, and it worked really well. (I got it from reading a sewing manual printed in the 1960s!)
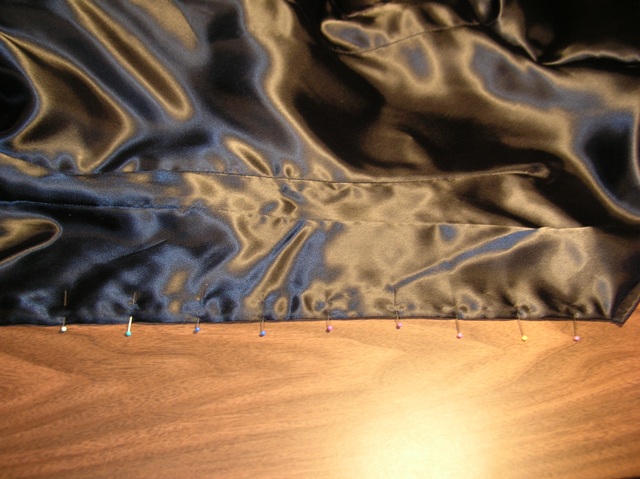
First I measured and determined where the buttons would go. Then, I placed pins on each buttonhole location:
Then I sewed a basting stitch in a contrasting color (I chose red) EXACTLY 1.5 inches from the edge of the fabric. Now, when I make the buttonholes I can back them up to the basting stitch without worrying about having uneven ends (which was a problem the last time I made a gown from this pattern).

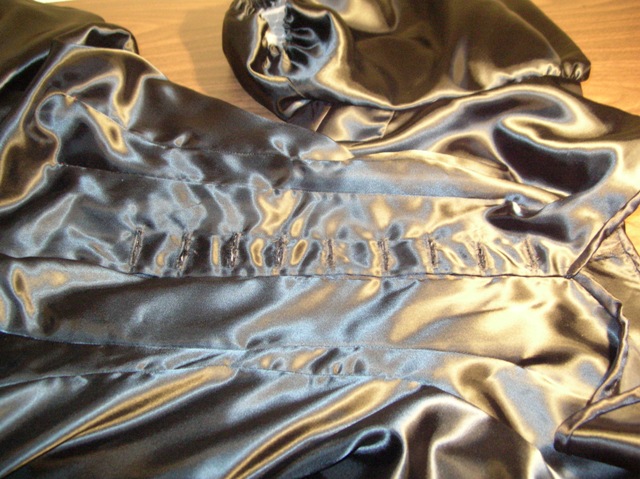
Then I removed the basting stitch, and the buttonholes are even:
Then I installed the buttons:

Ordinarily I would install a hook & eye as required by the pattern, but the neckline falls quite nicely without it.
With the buttonholes done, all the difficult bits are finished! All that is left is a few pieces of trim and a hemline. Woot!
Step 55: Install the front pouf.
Steps 56 - 58: Make the small bows in the front (with 4" tails in this case).
The only thing I am displeased with, so far, is that I didn't really succeed in my crusade against raw edges. In fabric like this, the edges fray very quickly, and if I had been able to flat-fell every single seam, it would have been better. However, I was between a rock and a hard place since the flat-felled seams show on the outside. There will definitely be some raw edges visible to the wearer of the gown, but not to anyone else and really, that's what matters. :)
July 31, 2009. 4 hrs.
I made the back bow quite differently from the size the pattern suggested. I had 5 yards of fabric leftover, and the dress' future owner requested a bow that was as big as possible with very long tails, so I used all 5 yards to make the bow. I basically follwed the pattern instructions (except I made 2 tails for the bow, not just 1), but I supersized the whole thing:
August 1, 2009. Hem & bow installation. 9 hrs.
Marking the hem took quite a bit longer than I had original expected, but it's always better to go slowly and take the time to do it right the first time! With the permission of my client, I made a machine hem on this gown. A hand hem, of course, would have taken far longer, but probably looked a tad better. I am happy with the results, though!